How to Write Your First Tech Rider
15 min read · Updated July 7, 2026 · new bands, artists sending their first rider
A beginner-friendly walkthrough of every tech rider section — contact, FOH, monitors, PA & backline, power, stage plot, input list, hospitality, lighting — and how to actually write one that's venue-ready.
TL;DR — A tech rider is the full technical package you send a venue so they can prepare your show: contact, FOH/console, monitors, PA & backline, power, stage plot, input list, and often hospitality and lighting. Writing one means filling those sections with what you carry versus what you need provided, keeping the channel numbers on your plot and input list consistent, and exporting it as a PDF and a live link. In Techrider.live, one Rider produces both exports from the same data — so what you draw is what the engineer gets.
What a tech rider is — and what it isn't
A tech rider (short for technical rider) is the document that tells a venue, promoter, or festival what you need to perform. Console and channel count, monitor mixes, PA and backline, power, the stage layout, the input list, and frequently hospitality and lighting. Anything the venue has to provide, rent, patch, or prep goes in here.
The first mistake every new band makes is confusing the rider with one of its parts. These three terms get used interchangeably and they are not the same thing:
- The stage plot is the map — a top-down picture of where everyone and everything goes on stage.
- The input list is the table — channel-by-channel, what each input is.
- The tech rider is the whole package — plot + list + every other section wrapped around them.
Send only a stage plot and you've answered where but left what console, how many mixes, who's providing the bass amp unanswered. The plot is necessary; it's not sufficient. If you want the concept first, read What Is a Tech Rider? (Sections Explained). If you need the map specifically, that's What Is a Stage Plot?.
Table of contents
- What a tech rider is — and what it isn't
- The sections of a tech rider
- How to write yours, step by step
- Templates vs a living document
- FAQ
The sections of a tech rider
There's no single mandatory template, but most working band tech riders cover the same ground, roughly in the order an engineer expects to read them. Think of these as the map of the territory — not every show needs every section, but completeness matters. An empty section that says "not required" reads far better than a section that's missing entirely (absence reads as "we forgot").
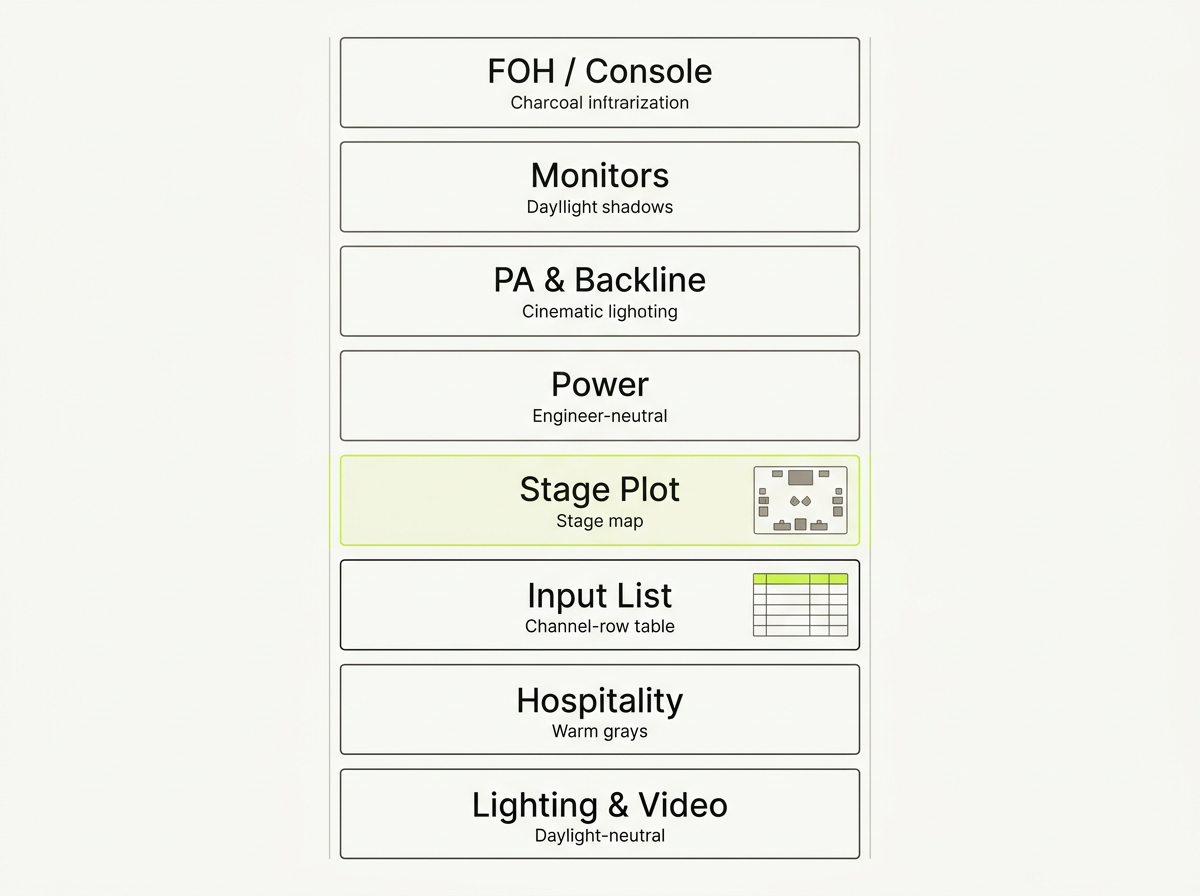 Fig. 1 — The sections of a tech rider. The stage plot and input list are two of them; the rest wraps around them.
1. Contact. Band or artist name, plus a primary contact (usually the tour manager, or for a new band, the person who actually answers their phone on show day). Email and phone. Make it the person the venue can reach at load-in, not a manager who's three time zones away.
2. FOH / console. What front-of-house console you prefer or require, your channel count, and any outboard needs. State what's a preference versus what's required — at festivals that distinction is the difference between a smooth advance and a refused contract. If you'll accept the house console, say so; if you carry your own, list the make and model.
3. Monitors. How many mixes, wedges versus in-ear monitors (IEMs), and who's on what mix. State the mix count, the destinations, and whether you bring your own IEM system or need it provided.
4. PA & backline. The PA is the house sound system. Backline is the venue-supplied instrument gear — amps, drum kit, keyboards, sometimes a bass rig. The key sentence in this section, for every item, is the same: what you carry versus what you need provided. "We carry a guitar amp; we need a venue-supplied bass rig and drum kit."
5. Power. Where you need AC on stage and roughly how much. Multiple high-draw rigs on one circuit is how shows go dark mid-set — mark the drops on your stage plot and total the draw here.
6. Stage plot. The top-down map: every performer, instrument, mic, DI, monitor, and power drop in place, with stage directions labeled from the performer's perspective. The section everyone recognizes — but only one section. (How to make one →)
7. Input list. The channel-by-channel table: number, name, mic/DI, stand, phantom power, patch notes — the document the patch tech works from. Order it drums-first, then bass, then the rest, grouped in blocks of 8 (that's how consoles are laid out). The most damaging error here is channel numbers that don't match the plot. (Input list vs patch sheet →)
8. Hospitality. Often a separate hospitality rider, folded in at smaller venues: catering, water, parking, dressing room, and load-in/soundcheck/doors times. It's non-technical in name, but it rides along — and the schedule part (load-in, soundcheck, doors, set time) is what every venue actually opens the rider for first.
9. Lighting & video. Lighting cues, video, projection, screens. Small-club bands often skip it — fine. It's essential for theatre, corporate, and larger tours. If you have a lighting designer, list them; if you'll accept whatever the house has, say that.
Not every show needs all nine. A duo in a 100-cap room may skip lighting; a theatre tour may add video. The list above is the territory — adapt it to the show.
How to write yours, step by step
Writing a tech rider isn't a writing problem. It's an inventory problem: walk the stage in your head, write down what's there, write down what you need, keep the numbers consistent, and export. Here's the order that works.
Step 1 — Start one Rider, not one document
In Techrider.live, a Rider is the reusable container that holds your stage plot, input list, monitor mixes, power, and notes as one connected document. Create a new Rider and you get all the sections at once — you fill them in over the next few steps. Crucially, the dates and venue are not baked into the core Rider config, so the same Rider gets reused across every show on a run. You write it once; you reuse it many times.
Fig. 2 — One Rider produces every section from the same data source.
Step 2 — Fill in contact and FOH first
These are the sections a venue reads before anything else. Put the band name, the show-day contact (name, phone, email), and your FOH/console preference. Mark preferences as preferred and absolutes as required — be honest about what the house console you'll accept. If you're bringing your own engineer, name them here.
and the FOH panel (console make/model field set to "Preferred", a second field "Acceptable", channel count field showing "16") filled in. The "Preferred" label is subtly highlighted with an acid-green tag to distinguish it from "Required". Neutral UI.) Fig. 3 — Contact and console sections, with preferred vs. required made explicit.
Step 3 — List your monitors and mixes
Count your monitor mixes. State whether each is a wedge or an IEM, and which performer it serves. If you bring your own IEM transmitter and bodypacks, say so; if you need wedges provided, list how many. The monitor engineer reads this section like a brief — give them destinations, not adjectives.
, Mix 2 — Vocal 2 (wedge), Mix 3 — Guitar (IEM), Mix 4 — Bass (IEM), Mix 5 — Drums (IEM). Each row links to the performer and input channels. Neutral UI, channel badges synced.) Fig. 4 — Monitor mixes with destinations and types, linked to the input list.
Step 4 — Inventory your PA and backline (carry vs. provided)
Walk your rig. For every instrument, write down whether you bring it or the venue provides it. Group by category: amps, drum kit, keyboards, bass rig, percussion. The two-column framing — carry vs need provided — is what makes this section scannable for a venue that has to source gear.
, keyboard, two wedges. Each item is a row with a name and a notes field. Neutral UI, two-column layout aligned to a grid.) Fig. 5 — Backline split into what you carry versus what the venue supplies.
Step 5 — Build the stage plot
Now the map. Place performers, then instruments and backline, then mics, DIs, and monitors, all top-down with stage left/right from the performer's perspective. Mark power drops where you'll need AC. Every mic or DI you place here becomes a channel on your input list — in Techrider.live the two are one data model, so the channel numbers stay in sync automatically. (Full walkthrough: How to Make a Stage Plot for Your Band.)
Fig. 6 — The stage plot, with channels synced to the input list.
Step 6 — Build the input list
The channel-by-channel table, ordered drums-first, grouped in blocks of 8. Columns: number, name, mic/DI, stand, phantom power (48V), patch notes. This is the document the patch tech works from — be specific ("Kick — Shure Beta 91A inside, no stand, no phantom"). Run the missing-info check before you call it done: it scans the Rider for gaps — an unlabeled mic, a channel with no name, a missing monitor — and flags them before they become a day-of phone call. (Deep dive: How to Build an Input List / Patch Sheet.)
, then vocals and instruments. A "missing info" panel flags one item: an unlabeled DI on channel 12. The fix is one click away. Neutral UI, acid-green accents on flagged rows.) Fig. 7 — A complete input list with the missing-info check catching a gap.
Step 7 — Add hospitality and schedule
Catering, water, parking, dressing room, and — most importantly to the venue — the schedule: load-in, soundcheck, doors, set time. Keep hospitality reasonable for the room; a small club won't fulfill the same rider a theatre will, and asking for it reads as out of touch. Match the ask to the gig.
Step 8 — Export the PDF and copy the share link
Export the PDF — festival networks fail, phones die, emails get buried; a downloadable PDF is your safety belt and what gets printed at load-in. Then copy the share link — this is the live, view-only link to the current Rider. Email it to the venue, the engineer, and your tour manager. Both exports come from the same source, so they never disagree.
You can also turn on Feedback — a toggle that lets the venue comment on the rider without editing it. The local engineer can flag "we don't have that console" or "the bass amp is broken, bring yours" as a comment, and you keep full edit control. When you want a real second pair of hands on the document, invite up to three collaborators by email to open, edit, save, export, and inspect the history of the same Rider — that's multi-editor collaboration, asynchronous by design. (Real-time simultaneous editing with live presence is on the roadmap, not shipping today.) Full walkthrough: Collaborating on a Rider.
. Neutral UI, acid-green accents on the action buttons.) Fig. 8 — One Rider exports to both PDF and a live link, with Feedback open to the venue.
Templates vs a living document
Here's the trap with "tech rider templates": a template is frozen the moment you fill it in. You download a template, type your band's name at the top, export a PDF, and email it to the venue. A week before the gig the lineup changes — the guitarist can't make it, you add a keys player, the monitor mix count shifts — and the PDF sitting in the venue's inbox is now wrong. Nobody updates it. The venue patches against a ghost.
A living document inverts that failure mode:
- One source of truth. Stage plot, input list, monitor mixes, power, and notes all live in one Rider, so a change in one place propagates everywhere. Move a mic on the plot and its channel moves on the input list.
- A live link, not a frozen file. The share link is always the current version. The venue is never looking at stale gear. A freshly dated PDF is re-exported from the same data whenever something material changes.
- Multi-editor collaboration. You, your engineer, and your TM edit the same Rider in turn — open, edit, save, inspect history — without emailing revised PDFs back and forth.
The healthiest workflow uses both outputs: one source of truth that emits a fresh PDF and a live link from the same data. That's the argument for treating your tech rider as a living document rather than a template you fill in once. (Read the full case: Why Your Tech Rider Should Be a Living Document.)
If you want to start from a concrete example rather than a blank page, grab a free stage plot template and customize from there — then let it grow into a full Rider as you add the other sections.
FAQ
What is a tech rider? A tech rider (technical rider) is the full package of technical requirements a band or artist sends to a venue — contact, FOH/console, monitors, PA and backline, power, stage plot, input list, hospitality, and (where relevant) lighting and video. The stage plot is one section inside it. (What Is a Tech Rider? →)
What should be in a tech rider? The standard sections are contact, FOH/console, monitors, PA and backline (carry vs. provided), power, stage plot, input list, hospitality and schedule, and lighting/video where relevant. Not every show needs all of them, but a present, complete rider reads far better than one with missing sections.
How long should a tech rider be? Long enough to be complete, short enough to be scannable. A small-club four-piece might fit everything on one to two pages (plot + input list + a short backline/hospitality note). A theatre or festival tour runs longer because the FOH, monitor, backline, and lighting sections expand. Length isn't the goal — completeness and consistency are. (Please verify: "one to two pages" for a small-club rider is a general guideline, not a hard rule — confirm against your own venue's expectations.)
Do small venues need a tech rider? Yes — arguably more than large ones. The smaller the room and the tighter the changeover, the less slack there is for day-of surprises. A simple rider with a labeled plot and a clean input list lets the engineer pre-place mics and wedges before you arrive, which is exactly what saves soundcheck time at a small gig. Hospitality asks at small clubs are usually simpler or more flexible, but the technical rider still matters.
Is a tech rider the same as a stage plot? No. The stage plot is the top-down map of where things go on stage. The tech rider is the whole package, of which the plot is one part — alongside the input list, console and monitor specs, power, backline, hospitality, and more. Sending only a stage plot answers where but leaves the rest unanswered. (Stage plot vs tech rider →)
What's next
- 📄 What Is a Tech Rider? (Sections Explained) — the concept reference for every section above.
- 🗺️ How to Make a Stage Plot for Your Band — the 5-step walkthrough for the map section.
- 📋 How to Build an Input List / Patch Sheet — go deep on the channel table.
- 🧩 Free Stage Plot Template (Download + How to Use) — start from a concrete example.
Further reading
- What is a Technical Rider and why do I need one? — Improvised Music Company
- What is a Technical Rider? (Plus Real Examples & Stage Plots) — The Rock Factory
- Rider (theater) — Wikipedia
Last updated: 2026-07-07 · Reviewed by the Techrider.live team · Tested against real festival and club tech riders.
Related guides
How to Make a Stage Plot for Your Band (5-Minute Guide)
A 5-step walkthrough to make a clean, engineer-readable stage plot for your band — set the stage, place performers, add gear and mics, then export a PDF and share link.
9 min readTutorialsFree Stage Plot Template (Download + How to Use)
A stage plot template is a pre-laid-out starting point for your band's stage map. Pick one of four shapes, customize performers and gear, and export a PDF.
9 min readTutorialsHow to Build an Input List / Patch Sheet (with Template)
A channel-by-channel table of every source on stage. Learn the input list columns, the drums-to-vocals ordering, 48V and DI rules, and how a patch sheet differs.
7 min read